One of the things I like when debugging code, let say in conventional Java applications, is the ability to debug into the external libraries with full "source code" visibility. Being able to look into source code of external libraries during debugging has it's own advantages:
- I can set breakpoints on those code which are not mine, with full visibility to the actual source.
- I can see the actual (external) code implementation, and verify values/variables during debugging (at runtime).
- Learn more about other peoples code (most important one for me :) ).
Normally you need to do some pre-configuration in your project before you can have this "full code visibility" to external libraries. This pre-configuration includes:
- Downloading the source code of external libraries. Most of the time the "source code" is available for download or already packaged in the library. A good example is JDK, which includes the source code already once you have it installed.
- Configuring your project so it knows where to find the "source code" of these external libraries when debugging.
With Android, specially for folks working on Windows platform, having this setup and configured has not been that easy; for the following reasons:
- Downloading Android source code has been pretty easy (using Git) for Apple and Linux users, but not that easy for developers using Windows platform.
- Until Android 4.0 (API level 14), the source code was not included in Android package, e.g.
Android SDK source code could not be downloaded when using SDK Manager.
Below is a brief illustration on how to add Android source code in your project for better debugging and visibility. I have added screenshots whenever possible (a picture is worth 1000 words), and hope this has made it easier.
Before starting, following assumptions has been made:
- You already have an IDE/Development tool (in my case Eclipse) installed and running on your machine.
- You have some basic knowledge of Android, such as how to install Android SDK, and how to setup an Android project.
I the following example, I have already created a simple Android project based on SDK 4.0.3 (API Level 15).
- Make sure you have already downloaded the Android SDK source code on your machine. Following screenshot illustrates the SDK Manager whereby "Sources for Android SDK" is checked. This makes sure source code is downloaded.
 |
| Downloading SDK source code using Android SDK Manager |
- From Eclipse main menu, select Project -> Properties
- On left pane, select "Java Build Path"
 |
| Project Build path and Libraries |
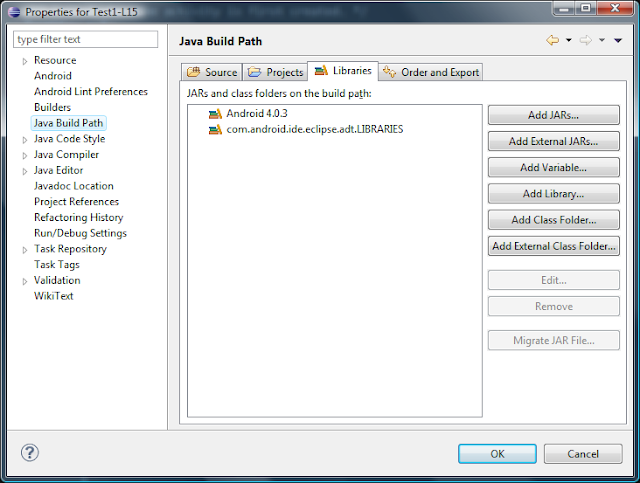
- On the right pane select "Libraries" tab. Open the "Android 4.0.3".
 |
| Android SDK library and reference to the corresponding jar file |
This is the SDK library your project is dependent on. You will see the android.jar and its settings once you open the android.jar property. As it can be seen, the property "Source attachment" is set to "None". Even though you have downloaded the source, project is not able to access it since by default the source is not attached to the external library.
- Select "Source attachment:(None)" and click on "Edit" button on the right. In "Source Attachment Configuration" window, select "External Folder".
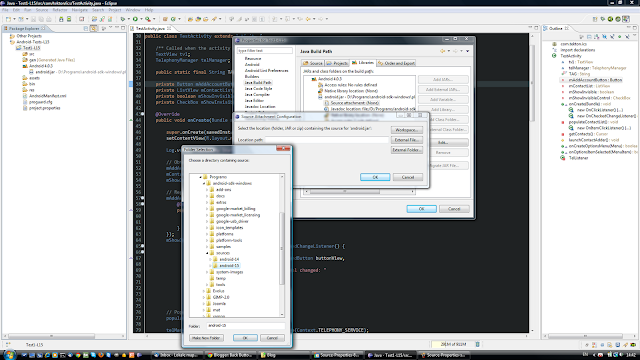 |
| Selecting the path where SDK source code is installed. |
"Folder Selection" is opened. Browse to where SDK source is installed. Normally this can be found within android SDK installation directory, and in a folder called "sources". select the folder (in my case android-15) and click OK. click OK again.
 |
| Setting the proper Source Attachment |
Back in the first panel, you should now see the property "Source Attachment" referring to the path where SDK source can be found.
This should be it. Now, you are able to browse Android SDK source when running in debug mode, or even just when browsing in your editor. Below a simple example where I am using the android.widget.Button class in my code. After clicking on class name mentioned in my code, I can right click it and select "Open Declaration" (shortcut F3 in Eclipse under Windows).
 |
| Navigating to Source (Open Declaration) of "android.widget.Button" |
"android.widget.Button" source class is displayed.
 |
| Source of android.widget.Button |
Happy debugging :). Feel free to drop me an email or leave a comment.
In the next post, I will focus on how to use "Android Compatibility Package" in your projects. This is used to introduce features of newer versions of Android SDK into older versions of Android.


